Resin Composite Build-up on a Fracture Tooth
April 8, 2013 by Dr. Chong
This young girl had an accident at home, causing two-third of her crown fractured and worse of all, the pulp of the tooth exposed.
![Composite-Build-up-01 [1600x1200]](https://prestige-dental-care.com.my/wp-content/uploads/2013/04/Composite-Build-up-01-1600x1200.jpg) We did an emergency root treatment over the tooth to reduce her pain and later on, build back the tooth (below)…
We did an emergency root treatment over the tooth to reduce her pain and later on, build back the tooth (below)…
![Composite-Build-up-11 [1600x1200]](https://prestige-dental-care.com.my/wp-content/uploads/2013/04/Composite-Build-up-11-1600x1200.jpg) So, now she can smile confidently and pain free.
So, now she can smile confidently and pain free.
![Composite-Build-up-12 [1600x1200]](https://prestige-dental-care.com.my/wp-content/uploads/2013/04/Composite-Build-up-12-1600x1200.jpg) …
…
We did an emergency root treatment over the tooth to reduce her pain.
Root canal treatment (RCT) took 2 visits to be completed. After RCT, the tooth was ready for restoration.
Before restoration, an impression was taken form her mouth. The fracture part of the tooth on the plaster model was build back with waxl. Then, a silicon impression was taken from the plaster model where it would be transfer back into patient’s mouth for restoration.
During the restoration, resin composite was first build at the ‘side’ surface of the tooth (picture below). Then, the back surface of the tooth was built with composite resin with the help of the silicon impression (upper right picture).
Later, the front surface of the tooth was placed with dentine shade/colour to mimic the natural dentine laver of a teeth (lower left picture).
This followed by a layer of enamel shade which was placed on over the dentine shade to mimic the natural enamel layer of a tooth.
Next, a opaque white shade composite resin was place a the edge of the teeth to mimic flourosis of a ‘young’ teeth. The edge of the tooth was grind to follow its neighbour teeth and finally, the tooth was polish to make it smooth and glossy!!
We informed the patient that she might need a crown later as the latter is more durable!!
We did an emergency root treatment over the tooth to reduce her pain and later on, build back the tooth (below)…
So, now she can smile confidently and pain free.
…
Treating Fracture Tooth with Pulp Exposure
A 10 years old school-girl came to our clinic after she accidentally knocked her front tooth to the metal bar, causing two-third of her crown fractured and worse of all, the pulp of the tooth exposed.![Composite-Build-up-02 [1600x1200]](https://prestige-dental-care.com.my/wp-content/uploads/2013/04/Composite-Build-up-02-1600x1200.jpg)
Two third of the crown of the upper left central incisor fractured |
![Composite-Build-up-14 [1600x1200]](https://prestige-dental-care.com.my/wp-content/uploads/2013/04/Composite-Build-up-14-1600x1200.jpg)
The pulp of the tooth was exposed |
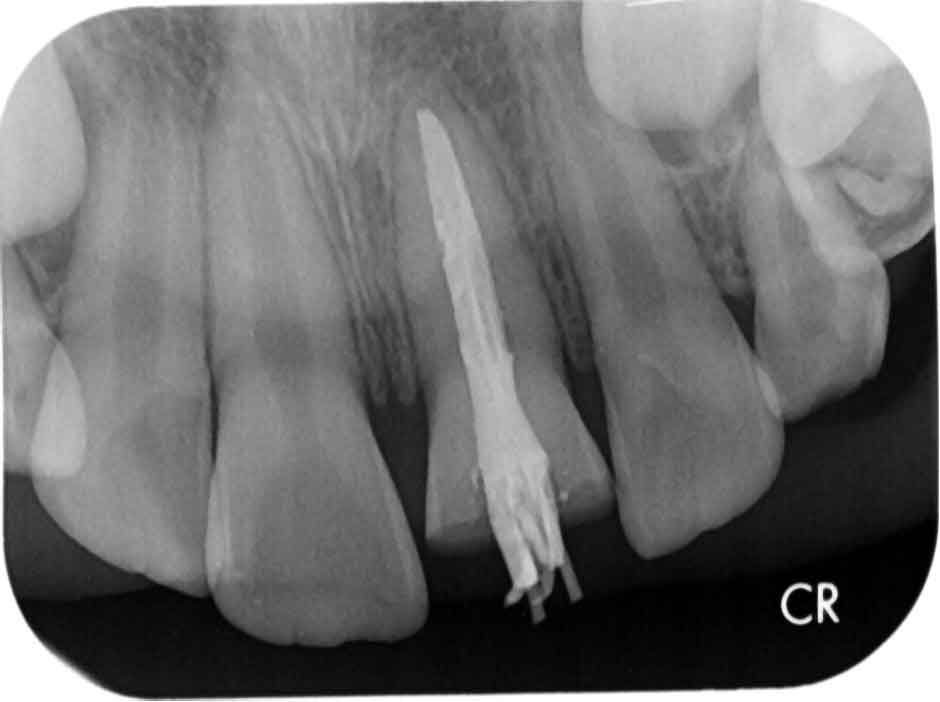
Radiograph: Root canal treatment was completed |
![Composite-Build-up-03 [1600x1200]](https://prestige-dental-care.com.my/wp-content/uploads/2013/04/Composite-Build-up-03-1600x1200.jpg)
The canal was sealed and ready for restoration |
![Composite-Build-up-07 [1600x1200]](https://prestige-dental-care.com.my/wp-content/uploads/2013/04/Composite-Build-up-07-1600x1200.jpg)
Silicon impresion (purple) on the model |
![Composite-Build-up-08 [1600x1200]](https://prestige-dental-care.com.my/wp-content/uploads/2013/04/Composite-Build-up-08-1600x1200.jpg)
The silicon impression was transferred into the mouth |
![Composite-Build-up-05 [1600x1200]](https://prestige-dental-care.com.my/wp-content/uploads/2013/04/Composite-Build-up-05-1600x1200.jpg)
The side surface of the tooth was built first, with composite resin |
![Composite-Build-up-06 [1600x1200]](https://prestige-dental-care.com.my/wp-content/uploads/2013/04/Composite-Build-up-06-1600x1200.jpg)
The side surface must have a good contact with the neighbour teeth |
![Composite-Build-up-10 [1600x1200]](https://prestige-dental-care.com.my/wp-content/uploads/2013/04/Composite-Build-up-10-1600x1200.jpg) Dentine shade of resin composite was placed a the front surface of the tooth Dentine shade of resin composite was placed a the front surface of the tooth |
Then, enamel shade was placed over the dentine shade |
|
Before treatment |
After treatment |
Read more
- Dental Caries
- Dental Filling (White and Silver)
- Aesthetic White Filling
- The way we do it with white filling
- Cases of Aesthetic filling with Composite Resin
- Case 2: Resin Composite Build-up on a Fracture Tooth
- Case 3: Aesthetic Fillings with resin composite
- Fear of Dental Treatment? How to overcome it..?
 :
:  :
: 